Tutorial 1 - Intro to Musculoskeletal Modeling
The tutorial below is designed for use with OpenSim version 4.0 and later. A version of the tutorial compatible with OpenSim version 3.3 is available here.
I. Objectives
Introduction to OpenSim
Musculoskeletal models enable us to study neuromuscular coordination, analyze athletic performance and estimate musculoskeletal loads. OpenSim is an open-source software that allows users to develop, analyze, and visualize models of the musculoskeletal system, and to generate dynamic simulations of movement [1]. In OpenSim, a musculoskeletal model consists of rigid body segments connected by joints. Muscles span these joints and generate forces and motion. Once a musculoskeletal model is created, OpenSim enables users to create custom studies, including investigating the effects of musculoskeletal geometry, joint kinematics, and muscle-tendon properties on the forces and joint moments the muscles can produce. With OpenSim, our goal is to provide a framework that allows the biomechanics community to create, share, and extend a library of models and dynamic simulation tools that can be used to study and quantify human and animal movement.
Purpose
The purpose of this tutorial is to introduce users to OpenSim by demonstrating the utility of a graphics-based musculoskeletal modeling framework to investigate how muscle-tendon lengths and moment arms depend on limb configuration. In this tutorial, you will:
- Become familiar with OpenSim's graphical user interface (GUI).
- Discover some limitations of musculoskeletal models.
- Explore differences between uni-articular ("1-joint") and bi-articular ("2-joint") muscles.
- Use OpenSim to approach an important clinical problem
Format
Each section of the tutorial guides you through certain tools within OpenSim's GUI and asks you to answer a few questions. The menu titles and option names you must select and any commands you must type to run OpenSim will appear in bold font. The questions can be answered based on information from OpenSim and basic knowledge of the human musculoskeletal system. As you complete each section of the tutorial, feel free to explore OpenSim and the lower extremity model further on your own. Depending on the amount of exploration you do, this tutorial will take about 1-2 hours to complete.
Introduction to the OpenSim GUI
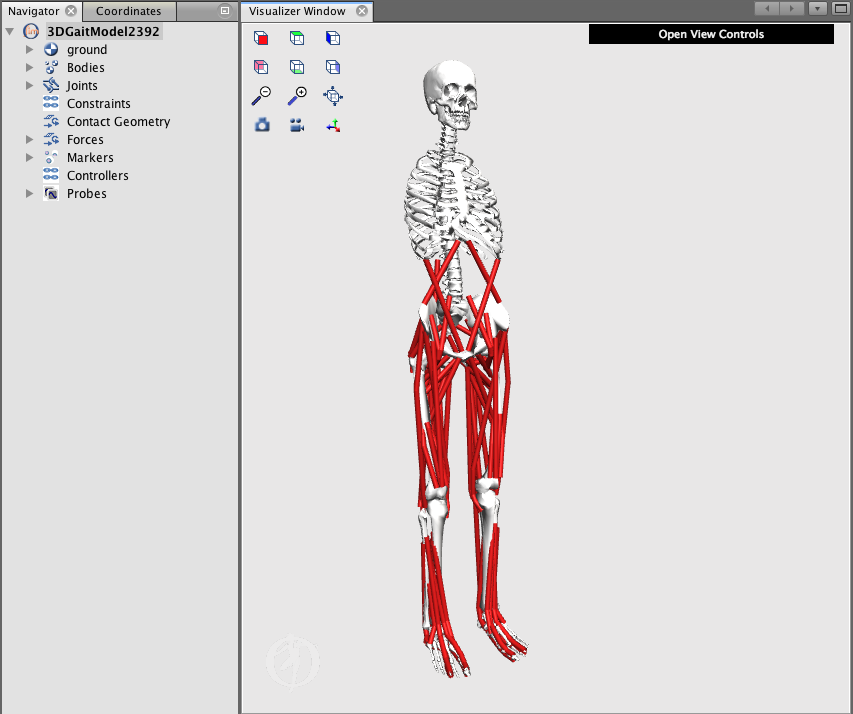
There are several key components of the OpenSim GUI that will be referred to throughout the tutorial. The table below will introduce you to these GUI components.
Note: A model is loaded in this example to illustrate the GUI, when you open OpenSim for the first time, there will be no models loaded.
| GUI Components | |
|---|---|
| Title | Screenshot |
| Toolbar | |
| Motion Textbox | |
| Motion Slider/ Video Controls | |
| Visualizer Window | |
| Navigator Window | |
| Coordinates Window | |
| Properties Window | |
For more documentation about the GUI see the User's Guide section on the Graphical User Interface
II. Musculoskeletal Model of the Lower Extremity
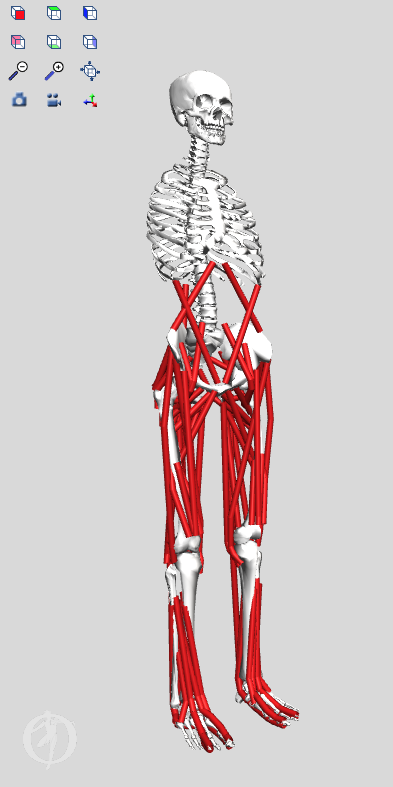
In this section, you will load a model of the lower extremity [2] into OpenSim and make the model "walk." The model represents an adult subject with an approximate height of 1.8 m and an approximate mass of 75 kg. The model consists of 13 rigid body segments and includes the lines of action of 92 muscles (43 per leg and 6 at the torso).
Loading a ModelThe first model you will analyze is gait2392_simbody.osim. To load this musculoskeletal model into OpenSim:
|
|
| Camera Action | Windows | Mac |
| Rotate | left-click and hold (PC or mouse) | single-finger click and hold (Mac trackpad) |
| Translate | right-click and hold (PC or mouse) | two-finger click and hold (Mac trackpad) |
| Zoom | scroll up or down (PC or mouse) | pinch or expand (Mac trackpad). |
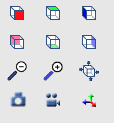
In addition to your mouse, there are six orienting icons located along the right side of the View window.
- To change the camera to view from the –X direction, click the icon.
- Similarly, click on the other icons to view from the other principal directions.
- Double click on a body to center it on the screen.
Before continuing, click the icon to reset the visualizer view.
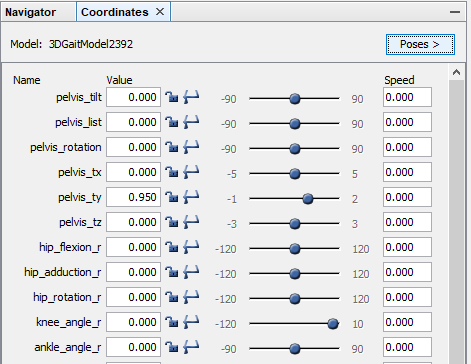
Model CoordinatesThe Coordinates window contains sliders that correspond to joint coordinates, or degrees of freedom, in the model. To see the Coordinates window, click the Window menu and select Coordinates. For the current model, the orientation of the pelvis corresponds to the orientation of the model with respect to ground.
|
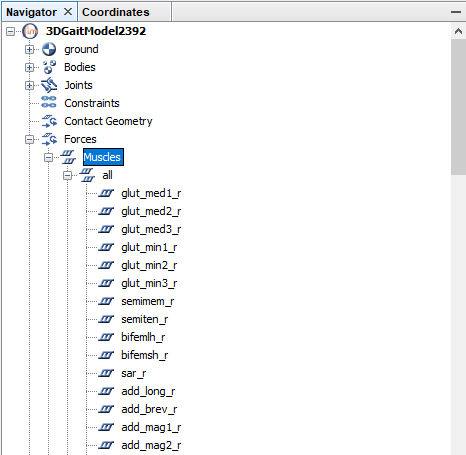
Muscles in a ModelMuscle-tendon paths are represented in OpenSim by a series of points connected by line segments. To see a list of all the muscles:
For some muscles, two points, the muscle origin and insertion, are sufficient to describe the muscle path. For other muscles that wrap over bones or are constrained by retinacula, intermediate wrapping or via points must be defined. To view these wrapping points:
|
Questions
1. Degrees of Freedom
a. Use the Coordinates panel to view the degrees of freedom of the model. How many degrees of freedom, in total, does the model have? List the degrees of freedom of the right leg.
b. All models are approximations. Compare the degrees of freedom in the model to the degrees of freedom in your lower limbs. Give an example of a joint motion in the model that has been simplified. Give an example of a motion that is not included in this model.
2. Muscles
a. How many muscles are in the model? How does this compare to the number of degrees of freedom in the model? What is the minimum number of muscles required to fully actuate the model?
Hint: Full actuation of the knee, for example, means both knee flexion and knee extension.
b. Name two muscles, other than the gluteus medius, in the model that are represented by multiple lines of action. Why do you think these muscles are represented in this way?
Hint: Other muscles with multiple lines of action use the same naming convention as the gluteus medius.
c. Which knee extensor muscles have wrapping points? At what knee angles do the wrapping points appear for each of those knee extensors? A muscle may have more than one wrapping point.
3. Modeling Limitations
a. Zoom in on the right hip, and display only the glut_max3_r muscle (right hip extensors group). Examine this muscle for the full range of hip flexion angles. What problems do you see with the path of glut_max3_r through the range of motion? In what ways are point-to-point representations of muscle paths a simplification of musculoskeletal geometry?
III. Joint Angles, Muscle-tendon Lengths, & Moment Arms
In this section, you will investigate how muscle-tendon lengths and moment arms depend on limb configuration. Musculoskeletal geometry is very important to the function of muscles and to the development of quantitative musculoskeletal models. Muscle-tendon forces depend on the muscle-tendon length, and joint moments depend on both muscle-tendon forces and moment arms. Therefore, accurate specification of musculoskeletal geometry is essential in developing an accurate model for predicting muscle-tendon forces and joint moments.
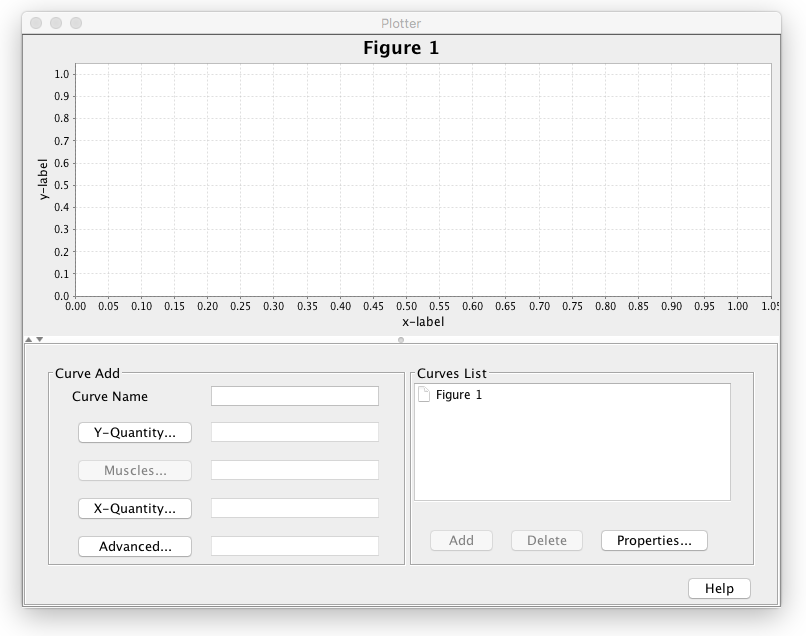
Using the PlotterOpenSim's Plotter allows you to plot muscle-tendon properties, such as length, moment arm, force, and joint moment. To generate a plot of fiber-length vs. knee angle for the rectus femoris and vastus intermedius muscles:
|
Questions
4. Muscle Fiber Length vs. Joint Angle
a. Study the plot of muscle fiber length vs. knee angle. For each of the rectus femoris and vastus intermedius, do you expect the fiber-length curve be different if the right hip was flexed? Why or why not?
b. In the Coordinates window, adjust the model's right hip flexion to 45 degrees (save the pose as r_hip_flex_45), add rectus femoris and vastus intermedius fiber-length curves for 45º hip flexion. Compare the muscle curves for the model with an unflexed hip you plotted previously to the curves for the model that you just plotted. How have the curves changed? Explain your findings. How can bi-articular muscles complicate analysis?
Note: To select multiple curve names, hold down Ctrl (PC) or Command (Mac) while selecting. To print or save a plot, right-click on the plot and select Print or Export Image.
5. Muscle Moment Arm vs. Joint Angle
Return the model to its original position with no hip flexion (click Poses > Default). Now plot the knee extension moment arm vs. knee angle for the right rectus femoris and vastus intermedius muscles.
- In a new plotter window, click Y-Quantity > moment arm > knee_angle_r and click X-Quantity > knee_angle_r.
- Select the right rectus femoris (rect_fem_r) and vastus intermedius (vas_int_r) muscles as before.
- Set the plot title to Knee Extension Moment Arm vs. Knee Angle
- Add the curves to the plot.
a. What are the peak moment arms for each muscle and at what knee angle do they occur?
Note: If you hover the cursor over a curve, a tool tip will give the coordinates at that particular point.
b. At what knee angle(s) are the moment arm curves not smooth (i.e. have points where the derivative is not continuous)? What do you think causes this? Hint: Look at Question 2.c
Feel free to make more plots for other limb positions, muscles, and/or joints. When you are ready to continue with the tutorial, close the plotter window and close the 3DGaitModel2392 model by clicking the File menu and selecting Close Model. Do not save the model settings to file— we close the model to ensure that any prior modifications made while exploring don't affect the rest of the tutorial.
IV. Assessment of Hamstrings Length During Crouch Gait
In this final section of the tutorial, you will use OpenSim to investigate a possible cause of crouch gait, one of the most common walking abnormalities among individuals with cerebral palsy. It is characterized by excessive flexion of the knee during stance phase, which is often accompanied by exaggerated flexion and internal rotation of the hip. One hypothesized cause of crouch gait is short hamstrings, and orthopedic surgeons will sometimes lengthen the hamstrings of such patients in an attempt to improve their posture and gait. However, other causes of excessive knee flexion are possible (e.g. weak ankle plantarflexors), and lengthening the hamstrings can compromise these muscles' force-generation capabilities [3]. How can a surgeon determine whether a hamstring lengthening procedure is warranted?
One possible way to judge whether a patient's hamstrings are shorter than "normal" is to develop a musculoskeletal model and compare the length of the hamstrings during the patient's crouch gait cycle to the length of the hamstrings during a normal gait cycle. Suppose that an orthopaedic surgeon has brought you some kinematic data for a patient who walks with a crouch gait. The surgeon is contemplating whether to operate and wants your opinion.
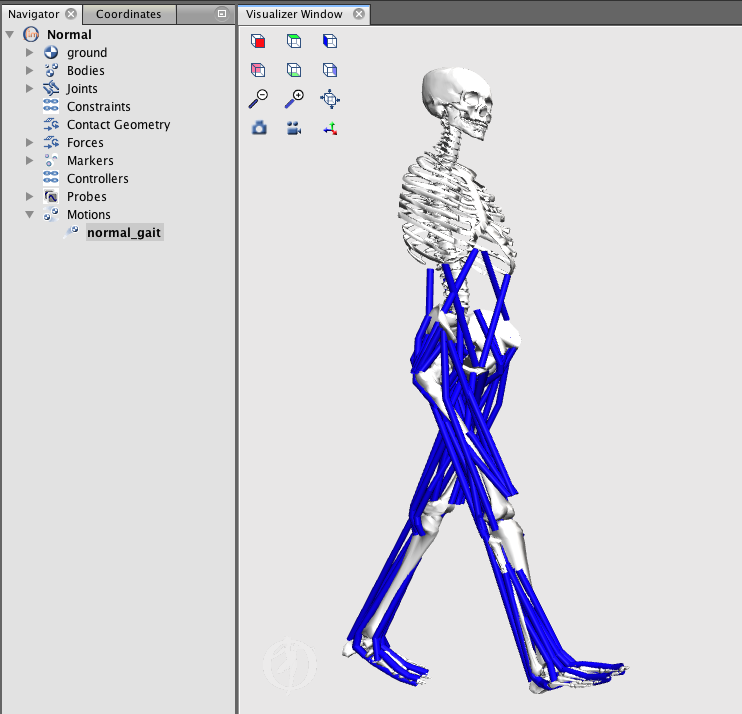
Loading a MotionRe-open the gait2392_simbody.osim model. To animate the model, you need to load an associated motion file into OpenSim.
After loading a motion, its name will appear in the motion textbox, located on the toolbar. Additionally, a new branch will appear in the Navigator titled Motions. Expand it to see all motions loaded for a particular model, as shown. The color of the muscles change to blue after the motion is loaded. Motion SliderThe motion slider corresponds to the current motion file. To play the current motion, drag the motion slider. To animate the model, use the video control buttons, e.g., click play . There are also buttons to loop , pause , and control the speed of the animation. |
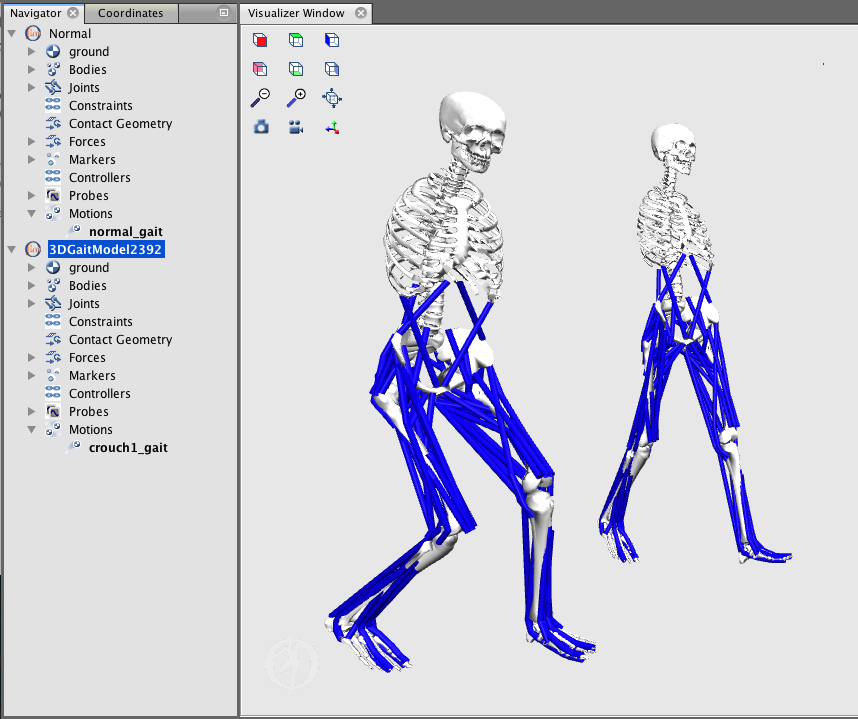
Multiple Models and MotionsOpenSim has the ability to load multiple models simultaneously. Follow these steps to open a second model and load a new motion:
|
Questions
6. Range of Motion
a. Synchronize and play the normal gait and crouch gait. Be sure to loop the animation, adjust the play speed, and rotate the models. Visually compare the two motions. From your observations, qualitatively describe the general differences in kinematics (joint coordinates) between the normal and crouch gait motions.
Now quantitatively compare knee flexion angles over the crouch and normal gait cycles.
- Open a new Plot window.
- Make the Normal model current by double-clicking its name, Normal, in the Navigator. It should become bold-faced.
- In the plot window, click Y-Quantity, select normal_gait, and select knee_angle_r. Click OK.
- Click X-Quantity and select normal_gait. Click OK.
- Edit the text in the Curve Name textbox to read Normal Gait.
- To add the curve of right knee angle vs. gait cycle, click Add.
- Make the Crouch model current by selecting it (double-click) in the Navigator. It should become bold-faced.
- In the same plotter window, click Y-Quantity, select crouch1_gait, and select knee_angle_r. Click OK.
- Click X-Quantity and select crouch1_gait. Click OK.
- In the Curve Name textbox edit the text to read Crouch Gait, then click Add.
b. Draw the plot of the knee angle curve for a normal gait cycle. Label the times at which heel strike and toe-off occur, and the stance and swing intervals.
c. What is the range of motion for knee flexion during stance phase for normal gait?
d. How does knee flexion range of motion for crouch gait compare to that of normal gait?
7. Hamstrings Length
An orthopedic surgeon believes that a patient may benefit from a hamstring lengthening surgery. You are tasked to compare the hamstrings (semitendinosus) length over a patients crouch gait cycle to the hamstrings length for a "normal" gait cycle.
Plot the semitendinosus muscle-tendon length over the crouch and gait cycles
- To delete the previous curves, select all the names from the Curves List and click Delete.
- Make the normal model current by selecting it from the Model drop down menu.
- Click Y-Quantity and select muscle-tendon length.
- Click on Muscles and select semiten_r from the list. Click Close.
Note: To quickly find the semiten_r, type semi into the pattern textbox.
- Click on Muscles and select semiten_r from the list. Click Close.
- Click X-Quantity and select normal_gait.
- In the Curve Name textbox edit the text to read Normal Gait.
- To add the curve of hamstrings length vs. gait cycle, click Add.
- To make a similar curve for the crouch gait data, make the crouch model current. Then, click on Y-Quantity and re-select muscle-tendon length.
- Click on Muscles and select semiten_r .
- Click X-Quantity and select crouch1_gait.
- In the Curve Name textbox, edit the name to read Crouch Gait, and then click Add.
a. Study the curves. Based on the plot, how do the peak hamstring lengths in normal and crouch gait compare? For this patient, would you recommend a hamstrings lengthening surgery?
b. What are some limitations of your analysis?
8. Additional Crouch Gait Files (optional)
The orthopaedic surgeon cares for three other patients who walk with a crouch gait. Repeat the above analysis for motion files crouch2.mot, crouch3.mot, and crouch4.mot. Note that you can associate more than one motion with a model. Would your recommendations to the surgeon be any different for these patients? If you would like to learn more about this type of analysis, please read reference [3].
Credits
Allison Arnold and Scott Delp with help from many others.
References
- Delp, S.L., Anderson, F.C., Arnold, A.S., Loan, P., Habib, A., John, C.T., Guendelman, E., Thelen, D.G. OpenSim: Open-source software to create and analyze dynamic simulations of movement. IEEE Transactions on Biomedical Engineering, vol. 55, pp. 1940-1950, 2007.
- Delp, S.L., Loan, J.P., Hoy, M.G., Zajac, F.E., Topp E.L., Rosen, J.M. An interactive graphics-based model of the lower extremity to study orthopaedic surgical procedures. IEEE Transactions on Biomedical Engineering, vol. 37, pp. 757-767, 1990.
- Arnold, A.S., Liu, M., Ounpuu, S., Swartz, M., Delp, S.L., The role of estimating hamstrings lengths and velocities in planning treatments for crouch gait, Gait and Posture, vol. 23, pp. 273-281, 2006.
Related content
OpenSim is supported by the Mobilize Center , an NIH Biomedical Technology Resource Center (grant P41 EB027060); the Restore Center , an NIH-funded Medical Rehabilitation Research Resource Network Center (grant P2C HD101913); and the Wu Tsai Human Performance Alliance through the Joe and Clara Tsai Foundation. See the People page for a list of the many people who have contributed to the OpenSim project over the years. ©2010-2024 OpenSim. All rights reserved.
